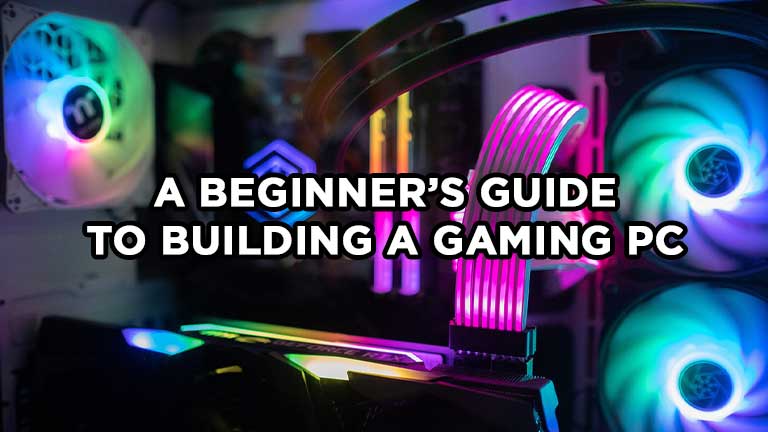
Are you a gaming enthusiast eager to take your gaming experience to the next level? Building your own gaming PC can be a rewarding and cost-effective solution. By customizing your rig, you can ensure it meets your specific requirements and provides optimal performance for your favorite games. In this step-by-step guide, we will walk you through the process of building a gaming PC, from selecting the components to assembling the final product.
Introduction: Why Build a Gaming PC?
Building your own gaming PC allows you to tailor every component to your specific needs, ensuring maximum performance and value for your investment. It gives you the flexibility to upgrade individual parts as technology advances, allowing you to stay at the cutting edge of gaming.
Planning Your Build
Before diving into the build process, it’s crucial to plan your gaming PC carefully. Consider the following steps:
Setting a Budget
Decide on a budget that suits your financial capabilities. This will help guide your component choices and ensure you don’t overspend.
Defining Your Gaming Needs
Assess your gaming requirements. Determine the types of games you play and the level of performance you expect. This will influence the selection of components.
Researching Components
Thoroughly research each component before making a purchase. Compare different models, read reviews, and consider factors like compatibility and performance benchmarks.
Selecting the Right Components
To build a high-quality gaming PC, you need to choose the right components. Here are the key components you should consider:
Processor (CPU)
The CPU is the brain of your gaming PC. Look for a processor that offers a balance between performance and price, considering factors like clock speed, core count, and cache size.
Graphics Card (GPU)
The GPU is responsible for rendering graphics in games. Select a graphics card that matches your gaming requirements and budget. Consider factors like VRAM, CUDA cores (for NVIDIA), and Stream Processors (for AMD).
Memory (RAM)
Choose RAM modules that offer sufficient capacity and speed. DDR4 RAM is the standard choice for modern gaming PCs.
Storage (SSD/HDD)
Consider both SSDs and HDDs for storage. SSDs provide faster load times, while HDDs offer larger capacities at a lower cost per gigabyte. You can use an SSD for your operating system and frequently played games, and an HDD for bulk storage.
Motherboard
Ensure the motherboard is compatible with your chosen CPU and has the necessary expansion slots for your needs. Consider features like USB ports, PCIe slots, and RAM slots.
Power Supply Unit (PSU)
Invest in a reliable and efficient PSU that can handle the power requirements of your components. Consider factors like wattage, efficiency rating, and modular cables.
Cooling System
Choose an adequate cooling system to prevent overheating. Options include air coolers and liquid cooling solutions. Ensure the cooling solution is compatible with your CPU and case.
Case
Select a case that accommodates your components and provides proper airflow. Consider factors like size, cable management options, and aesthetic appeal.
Peripherals (Monitor, Keyboard, Mouse)
Don’t forget to consider peripherals. Choose a monitor with the desired resolution and refresh rate, and select a comfortable keyboard and mouse for an immersive gaming experience.
Preparing Your Workspace and Tools
Before starting the build process, create a clean and organized workspace. Ensure you have the necessary tools, including screwdrivers, thermal paste, cable ties, and an anti-static wrist strap.
Assembling Your Gaming PC
Now comes the exciting part: assembling your gaming PC. Follow these steps to ensure a successful build:
Installing the CPU and CPU Cooler
Gently place the CPU into the motherboard’s CPU socket, aligning the pins. Attach the CPU cooler according to the manufacturer’s instructions, applying thermal paste if necessary.
Installing RAM Modules
Insert the RAM modules into the designated slots on the motherboard, ensuring they click into place. Follow the motherboard manual for proper configuration.
Mounting the Motherboard
Carefully place the motherboard into the case, aligning the mounting holes. Secure it using screws or standoffs, ensuring it’s properly grounded.
Installing the Graphics Card
Insert the graphics card into the appropriate PCIe slot on the motherboard. Ensure it’s securely seated and use screws or brackets to fasten it to the case.
Connecting Storage Devices
Connect your SSDs and HDDs to the motherboard using SATA cables or M.2 slots. Ensure they are powered and properly recognized in the BIOS.
Power Supply and Cable Management
Install the power supply into the case, connecting the necessary cables to the motherboard, graphics card, storage devices, and other components. Route and manage cables neatly for better airflow and aesthetics.
Connecting Peripherals
Connect your monitor, keyboard, mouse, and other peripherals to the appropriate ports on the motherboard or graphics card.
BIOS Setup and Drivers Installation
Power on your newly assembled gaming PC and enter the BIOS. Configure settings like boot order, RAM frequency, and fan profiles. Install the latest drivers for your components, including the GPU and motherboard.
Installing the Operating System
Insert your chosen operating system installation media and follow the on-screen instructions to install the OS on your gaming PC. Ensure you install the necessary drivers and updates afterward.
Post-Assembly Checks and Testing
Once the OS is installed, perform a series of checks and tests to ensure everything is functioning correctly. Run benchmarks, stress tests, and monitor temperatures to identify any potential issues.
Optimizing Performance and Overclocking
To maximize your gaming PC’s performance, you can explore overclocking options for your CPU and GPU. However, be cautious and follow proper overclocking procedures to avoid damaging your components.
Maintenance and Upgrades
Regularly clean your gaming PC to prevent dust buildup and optimize airflow. Stay updated with the latest drivers and firmware updates. Consider upgrading components as your gaming needs evolve.
Conclusion
Congratulations! You have successfully built your gaming PC from scratch. By following this comprehensive step-by-step guide, you’ve created a customized rig that delivers the performance you desire. Enjoy your immersive gaming experience!
5. FAQ
Is building a gaming PC difficult for beginners?
Building a gaming PC may seem daunting at first, but with proper research and guidance, it can be an exciting and rewarding experience even for beginners.
How much does it cost to build a gaming PC?
The cost of building a gaming PC varies depending on the components chosen. It’s possible to build a capable gaming PC within a budget of $800 to $1,000.
Do I need to be tech-savvy to build a gaming PC?
While basic computer knowledge is helpful, detailed instructions and resources are available to guide you through the process. Patience and attention to detail are key.
Can I upgrade my gaming PC in the future?
Yes, one of the advantages of building your own gaming PC is the ability to upgrade individual components as needed. This ensures your rig stays up to date with the latest technology.
Are prebuilt gaming PCs a better option than building one myself?
Prebuilt gaming PCs offer convenience, but building your own allows for customization and potential cost savings. It also provides a better understanding of your PC’s components.


